Thursday, August 29, 2013

Download a Set of Free Tools for Managing Hyper-V R2


Follow Our Daily Tips
Windows Server 2008 R2 Hyper-V can be managed locally or remotely from another Windows Server 2008 R2 server using the Hyper-V Manager console. Hyper-V Server 2008 R2 does not provide a graphical user interface because it is designed to be managed remotely. 

An option for managing Windows Server 2008 R2 Hyper-V and Hyper-V Server 2008 R2 is to use the Remote Server Administration Tools (RSAT) for Windows 7. You can download RSAT for Windows 7 for free from the Microsoft Web site. 

RSAT for Windows 7, which can be installed on either an x86 or x64 version of the OS, includes a variety of tools including Hyper-V Manager and Failover Cluster Manager. After you download and install RSAT for Windows 7, you can enable all the available tools or only a selection of tools using the Windows Features control panel applet. And you can access the tools from Administrative Tools in Windows 7. 

From the Microsoft Press book Windows Server 2008 Hyper-V Resource Kit by Robert Larson and Janique Carbone with the Windows Virtualization Team at Microsoft.

Friday, August 23, 2013

Get the Full Path of a Folder or File in Windows 7


Follow Our Daily Tips
If you recently moved from Windows XP to Windows 7, you probably noticed that the address bar no longer shows the full path of the current folder in the traditional way – you’re probably used to seeing backslash characters separating folder names. If you need to see the full path displayed that way, click anywhere to the right of the path in the address bar or right-click any part of the address bar and choose Edit Address.

The right-click shortcut menu includes additional options that allow you to copy the current address to the Clipboard. Click Copy Address to save the location in a format that is optimized for copying and pasting folders in Windows Explorer or use Copy Address As Text if you plan to paste the folder path into a document.

To copy the full path for an individual file, hold down the Shift key as you right-click the file, and then choose Copy As Path. This option is especially useful if you’ve found a file in Windows Explorer and you want to upload it to a Web site or open it in another program without browsing to the same location in an Open dialog box. Copy the full path for the file, then paste it into the File Name box in the target program.


Wednesday, August 21, 2013

Where Sticky Notes are Stored


Microsoft added Sticky Notes with Vista, and changed them entirely with Windows 7. In Vista, you can write longhand sticky notes with a mouse or pointer, or record them with a microphone, but you can't actually type them with a keyboard. Windows 7 does it the other way around.
But both versions save the notes in a file called StickyNotes.snt, located in the C:\Users\login\AppData\Roaming\Microsoft\Sticky Notes folder. (When I write login, I mean the name you use to log into Windows.) You can easily get to C:\Users\login\AppData\Roaming by selecting Start, typing %appdata%, and pressingENTER.
So if you make a lot of notes, you should make sure that your backup routine includes that folder. In fact, it's a good idea to backup the entire AppData folder.

Live Countdown Timer With Animations


Animated Countdown that counts down in seconds, minutes, hours and days to any date. Takes Time Zone & DST into account, and it can also count up!
Choose a design (Birthday, Sports, Baby Due Date, Wedding, and more), select your colors and add your own personalized message. More designs available soon.
Share the Countdown with anyone anywhere - just copy the web address (URL).


Saturday, August 17, 2013

Checking your Ubuntu Version

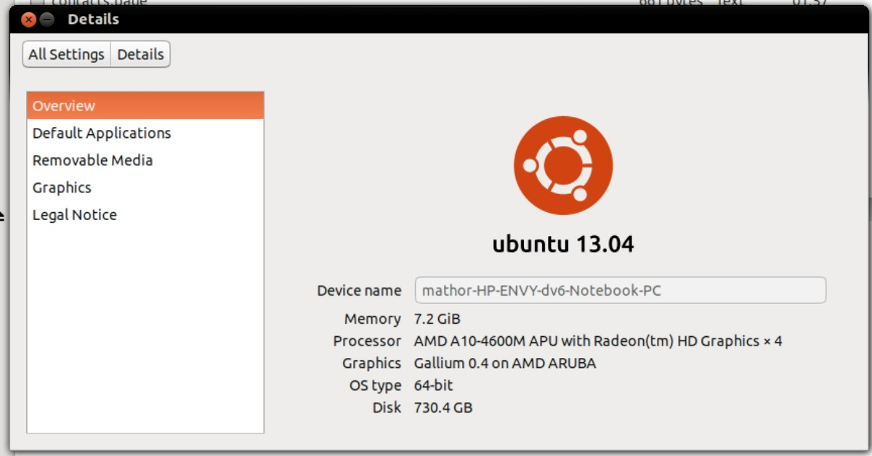
There are two ways to check which version of Ubuntu you are running. You can either check from within Unity, or put in a short command in the Terminal.

In Unity

Unity is the default desktop environment for Ubuntu 12.04 (Precise Pangolin) and later.
unity1.jpg
  1. Click on the "cog" in the upper-right portion of the screen.
  2. Select the option: About This Computer

In the Terminal

This method will work no matter which version of Ubuntu or desktop environment you are running.
terminal.png
  1. Open the Terminal (keyboard shortcut: Ctrl+Alt+T)
  2. Enter the command lsb_release -a
Your version will be shown on the Description line.

Monday, August 12, 2013

AutoDesk HomeStyler